DIY Clay Mask for Oily Skin: A Halal-Compliant Formula You Can Mix at Home
It’s 11am. You have survived the school run, the morning traffic and 3 emails you did not want to answer. Then you catch your reflection in the lift mirror. Your forehead is shining like a freshly polished table, your nose looks like it has been dipped in oil and your sunscreen has slid halfway down your face.
If you have oily skin, you know this story well. The shine arrives by mid-morning, your face feels greasy by lunchtime and your pores look bigger by the afternoon.
Here is the good news. A well-made DIY clay mask can help with surface oil and that “I haven’t washed my face in 3 days” feeling. You only need 4 simple ingredients. Here is the less glamorous news. A badly made DIY clay mask can leave your skin tight, flaky and irritated, and that is exactly what I want to help you avoid.
In this post I am sharing a Halal-Compliant dry-mix formula for oily skin that I would genuinely recommend. I will also explain why I use a dry mix for every DIY clay mask instead of a ready-made paste and how to use it without wrecking your skin barrier.
Why Your Skin Gets So Oily
Oily skin simply means your sebaceous glands make more sebum (your skin’s natural oil) than your skin needs. Genetics, hormones and heat all play a part. Some of us were born with oily skin and some of us develop it later as our hormones shift.
Here is the twist many mums miss. Oily skin can still be dehydrated. When we scrub hard, over-cleanse or skip moisturiser to “dry out” the oil, skin can end up feeling tight, shiny and thirsty all at once. So the goal is not to strip every last drop of oil. The goal is to manage it gently.
This is why a DIY clay mask can be a lovely weekly reset for oily skin. But it has to be the right kind of reset.
What a DIY Clay Mask Can (and Can’t) Do
Let me be honest with you, babe, because you deserve real information rather than hype.
What a DIY clay mask can do:
- Absorb excess oil from the surface of your skin
- Leave skin feeling cleaner, smoother and temporarily mattified
- Give you a calm 10 minutes to sit down and breathe
What a DIY clay mask cannot do:
- “Draw out toxins”. Your liver and kidneys handle that job
- Shrink your pores permanently. Pores do not open and close like doors
- Stop your skin from making oil. Oil production keeps going after you rinse
- Treat acne or fix pigmentation
Think of a DIY clay mask as a weekly deep-clean for the surface of your skin. It is not a miracle cure.
Meet the Ingredients
Every ingredient in this DIY clay mask has a job.
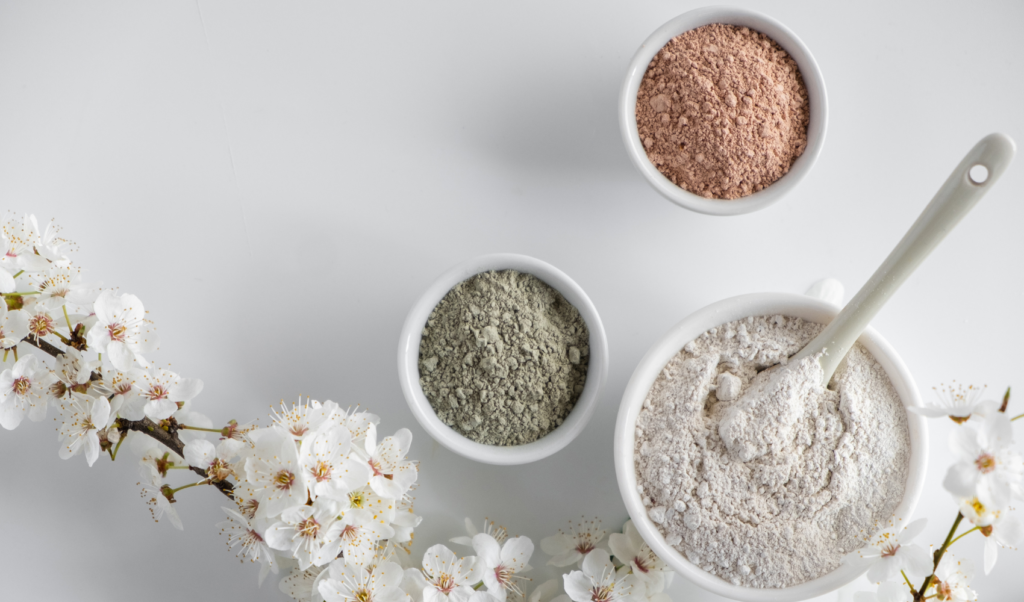
Kaolin Clay. This is a soft white clay and the gentlest of the common clays. It absorbs oil without being too harsh, so it suits oily skin that is also sensitive. It is the base of this formula.
Bentonite Clay. This clay swells when it meets water and is much more absorbent than Kaolin Clay. That makes it brilliant for oily T-zones. It is also stronger and mixes to an alkaline pH, which is higher than your skin’s natural slightly acidic pH. That is why we use only a small amount and keep the mask on for a short time.
Colloidal Oatmeal. This is oats ground into an ultra-fine powder. It is a plant ingredient widely used to soothe skin. In this DIY clay mask it softens the drying effect of the clays. No colloidal oatmeal? Blitz plain oats in a dry blender until they become a fine powder.
Rose Petal Powder (optional). This adds a light natural scent and a pretty blush colour. Choose a pure, food-grade or cosmetic-grade powder with nothing added.
Rosewater or RO water. This is the liquid you mix with the powder just before use. I use RO water in my formulations because it is clean and consistent. If you prefer Rosewater, read the label first. Many bottled Rosewaters contain alcohol or preservatives, and I only want you using a pure one. Not sure how to read the label? My beginner’s cheat sheet on how to read an INCI list will help.
Is This DIY Clay Mask Halal-Compliant?
Every dry ingredient here is either a natural mineral or plant-based. There are no animal-derived ingredients and no alcohol. That is why I call it Halal-Compliant.
Different suppliers sometimes add anti-caking agents or processing aids, so check your supplier’s information. If you follow a specific Halal authority, use their guidance as your final word.
The DIY Clay Mask Formula for Oily Skin (Dry Mix)
This makes about 5 masks.
| Ingredient | Amount | What it does |
|---|---|---|
| Kaolin Clay | 15 g | Gentle oil absorption (base) |
| Bentonite Clay | 5 g | Stronger oil absorption for shiny skin |
| Colloidal Oatmeal | 3 g | Soothes and softens |
| Rose Petal Powder | 1 g | Light scent and colour |
Total: 24 g
How to Make the Dry Mix
- Use a clean, completely dry bowl. Choose glass, ceramic or plastic. Bentonite Clay is traditionally mixed with non-metal tools.
- Add all the powders and sieve them through a fine sieve. This breaks up lumps and keeps your DIY clay mask smooth.
- Stir gently for 2 minutes until the colour looks even.
- Pour the mix into a clean, dry, airtight jar. Label it with the date.
How to Mix 1 Mask
- Spoon about 5 g of the dry mix (roughly 1 level tablespoon) into a small non-metal bowl.
- Add about 2 teaspoons (10 ml) of Rosewater or RO water. Stir with a clean spoon.
- Add more liquid a few drops at a time until you get a smooth paste, about the thickness of Greek yoghurt.
- Optional: add ½ teaspoon of plain Aloe Vera gel for extra slip.
- Use it straight away and throw away any leftovers.
Adjust the DIY Clay Mask for Your Oily Skin
| Skin type | Kaolin Clay | Bentonite Clay | Colloidal Oatmeal |
|---|---|---|---|
| Oily (base formula) | 15 g | 5 g | 3 g |
| Very oily and shiny | 10 g | 10 g | 3 g |
| Oily but sensitive | 20 g | 0 g | 3 g |
Why I Use a Dry Mix and Not a Ready-Made Paste
This is the part many DIY recipes skip.
The moment you add water, you have created a product that bacteria and mould love. A wet clay paste sitting in your fridge is not safe without a proper preservative. That is exactly why I wrote about why “preservative-free” can be a red flag.
A dry mix has no water in it, so nothing can grow. You add the liquid fresh each time, use it straight away and finish. Simple, safe and no waste.
How to Use Your DIY Clay Mask
- Cleanse first. If you wore sunscreen, start with a double cleanse. My Double Cleansing 101 shows you how.
- Pat your face dry.
- Apply a thin, even layer. Cover your forehead, nose, chin and cheeks. Keep it away from your eyes, lips and any broken skin.
- Set a timer for 8 to 10 minutes. This is the maximum. Do not let the mask crack and turn bone-dry, because clay that dries completely can pull moisture from your skin. Rinse while it is still slightly damp.
- Rinse with lukewarm water. Use your fingertips in gentle circles or a soft damp cloth.
- Moisturise straight away. Oily skin still needs hydration after a clay mask. Choose a light, non-greasy moisturiser. If you use Hyaluronic Acid, read why it can dry out your skin before you layer it on.
- Use sunscreen before leaving the house. Always.
How often? Start with 1 DIY clay mask a week. If your skin loves it, you can go up to 2x a week. More is not better!
Safety First: Who Should Skip This DIY Clay Mask
My daughter’s eczema taught me to take skin sensitivity seriously, so please read this part.
Skip the mask if you have:
- An active eczema flare or any broken skin on the face
- Sunburn or very irritated skin
- Dehydrated skin that already feels tight, even if it looks shiny
- Active, inflamed breakouts
Always:
- Patch test first. Apply a little mask to your inner forearm and wait 24 hours.
- Skip the essential oils. I never recommend raw essential oils on skin and I do not recommend adding them here.
- Skip lemon juice. It irritates and can make your skin more sensitive to the sun.
- Check with your doctor before using it if you have a skin condition or you are unsure.
Troubleshooting Your DIY Clay Mask
My skin feels tight and itchy. The mask was on too long or was too strong. Cut the time to 5 minutes and switch to the “oily but sensitive” formula with no Bentonite Clay.
It doesn’t feel like it is doing much. Move up to the “very oily” formula or leave it on for 1 or 2 extra minutes. Never go beyond 10.
My skin got oilier after the mask. Your skin may be dehydrated and reacting to being stripped. Shorten the time, use the gentler formula and moisturise well.
It feels gritty. Sieve the powders again. Fine powder gives a smoother paste.
It dries too fast. Add a few more drops of liquid or lightly mist your face with Rosewater while the mask is on.
How to Store Your Dry Mix
- Keep it in an airtight jar in a cool, dry place. Skip the bathroom shelf because it’s humid.
- Use a completely dry spoon every time. Never dip wet fingers in.
- Use the mix within 6 months. Throw it away if you see clumps, spots or notice a strange smell.
A Little Aura Ritual While It Sets
Beauty is not only what is in the bowl, babe. While your DIY clay mask sets, sit down. The cooking and laundry can wait.
Say Bismillah before you apply it. Send Selawat. Practise Husnuzon, use affirmations towards yourself and tell yourself that your skin is doing its best. If something weighs on your heart, add a few rounds of Astaghfirullah. I wrote about it in The Quiet Words That Lift Your Heart, Your Home and Your Aura.
Those 10 minutes will do more for your glow than you think.
DIY Clay Mask FAQ
Can I use a DIY clay mask every day? No. Clay masks are a weekly treat. Using them daily can strip your skin and weaken your barrier.
Is clay Halal? Kaolin Clay and Bentonite Clay are natural minerals. They are generally Halal-Compliant, but always check your supplier for any processing aids or additives.
Can I swap in Rose Clay or French Green Clay? Yes. Rose Clay is a gentle, Kaolin-style clay so it can stand in for Kaolin Clay. French Green Clay is closer to Bentonite Clay in strength, so use it sparingly.
Can I add Honey? You can add a little fresh Honey for softness and use the mask immediately. It will feel sticky, so many people prefer Aloe Vera gel instead.
Can I use it on my back or chest? Yes, with the same rules. Patch test first and keep it to a maximum of 10 minutes.
Final Thoughts
A good DIY clay mask will not change your life overnight. But a simple weekly ritual with the right formula, the right timing and the right moisturiser afterwards can help oily skin feel clean, calm and balanced. And you will get 10 whole minutes of peace.
Start with the base formula and watch how your skin responds. Adjust slowly and always listen to your skin.
If you try this DIY clay mask, let me know how it goes. I would love to hear from you.
Want More Formulas Like This?
Join my Inner Circle below. You will get 1 email a week with beauty, wellness and spiritual glow, plus simple formulas you can make at home. No spam, ever.
Formulator’s note: This post is for general education and is not medical advice. Every skin is different. If you have eczema, a skin condition or any concerns, please speak to your doctor before trying a new product.
With love, light and a little saffron, Yati